>> Introduction
>> Part 1: Caching
>> Part 2: CDNs
>> Part 3: Asynchronous Loading
>> Part 4: Image Optimization
>> Part 5: Security
>> Round-up and acknowledgements
In this post I’ll be covering four main points, all directly related to images. We all know that a site without images wouldn’t be very exciting at all. This isn’t the 1980s anymore – gone are the days of text-only bulletin boards. How could food bloggers ever create a buzz about a dish, or photographers display their work, if they couldn’t show anyone what it looked like? So we’re agreed? Images are important elements in a website, but despite this, some people use them incorrectly.
Some people think it’s fine to take the image directly from their camera and upload the whole thing to their site. Thankfully this is rare, because downloading multiple files of 1-4MB per page doesn’t make for a good load-time. There are occasional cases where uploading the full-sized file may be a good idea, if you are offering it to people as desktop wallpaper for example, but in general you should opt for a file size and format which is more appropriate for your content.
Choosing the right file format
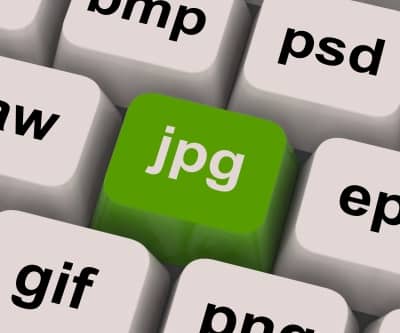
Image courtesy of Stuart Miles / FreeDigitalPhotos.net
There are some misconceptions about file formats and over the web you’ll often find them misused.
JPG (JPEG)
This is one of the most common file formats, and also the format you should almost always be using for photographs (unless you have a good reason not to). The file format uses lossy compression so when you save a file you can usually select a compression level between 1 and 100 (100 is the best quality and largest file size, 1 is the worst quality and smallest file size). It’s up to you to find the best level of quality for your photos, but the quality doesn’t usually start getting noticeably degraded in images until you start dropping below a compression level of 75 or so. You can use a tools such as LightRoom or Photoshop to save your photos with this compression – they also offer a whole array of other options. Alternatively there exist programs which can batch process images. My favourite is a small program called Image Resizer.
PNG
If you ever post screenshots, maps, graphics or the like then this is the format you should be using. The file size will often be larger than a similarly sized JPEG file but it is a format that supports lossless compression as well as transparency. For example – saving a screenshot of a map as a JPEG can result in significant loss of quality when the image is viewed full-size. Saving as a PNG will ensure that the map is always readable.
The final size of the images you post to your site is ultimately up to you, but just remember your visitors, and the time it takes to load these images.
Making your JPEGs even smaller
So, you’ve got your photos ready, you’ve chosen a size and a quality which is ideal… that’s it, right?
Wrong.
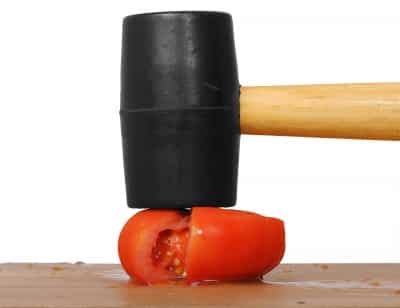
Image courtesy of Boaz Yiftach / FreeDigitalPhotos.net
What does the image above have to do with image compression? Well, not a great deal but I guess what I want to say is that you can still do more the make the file size even smaller, and the best thing of all is that this process doesn’t need to take any additional time at all (and unlike our poor tomato friend above, your images won’t change at all). Your photos will probably have a whole load of data embedded in the file – things like camera settings, GPS location data (if taken from your cellphone), descriptions, keywords. Stripping all this away isn’t going to affect the final image at all so you should consider running the files through a “lossless compressor” and best of all, there’s a WordPress plugin for this.
Smush.it is a tool from Yahoo!’s YSlow developer network. You can either “Smush” images directly on their site and manually upload them to your blog, or use the WordPress plugin WP Smush.it. The WordPress plugin will allow you to go through your whole media library and “smush” everything in it, and it will also automatically optimize all future uploads (this will make the amount of time required to upload images to WordPress marginally longer, since the files need to be sent to Smush.it before returning to your site).
Loading images on demand
Imagine someone visits your site and the information they need is sitting right at the top of the page. Imagine that this page is very long, and has a great number of images. Is it fair to make the visitor load all the images just to view the top section of the page? More importantly, is it fast? Of course, we all want our visitors to read more than just the opening paragraph on the site, but let’s face it – sometimes people don’t.
Ask yourself this: if the page seems to load very quickly for that user, do you think they will be more, or less, likely to continue browsing your site, as opposed to if the site took ages to load?
Now, how about if we just didn’t load the images until the visitor was actually looking at them? This practice is called “lazy loading” and can be described as follows:
Lazy loading is a design pattern commonly used in computer programming to defer initialization of an object until the point at which it is needed.
What this means is that the page will appear to load normally for the visitor, except anything which is out of sight for the user (for example further down the page) will not load until it starts to come into sight (the area of page visible to the user at any one time is called the “viewport”). Images will appear as blank placeholders only until you scroll to them and then they’ll load on demand. While this may sound difficult to implement there is, as you may have guessed, a plugin for this.
BJ Lazy Load takes seconds to install – the default settings are ideal for most sites and it’s really something you can “set and forget” which will drastically reduce the number of HTTP requests and bandwidth required to load all those different images you may have on your site.
Spriting
On a lot of websites, the various different menus, frames around images, background images in search bars and so forth are all comprised of different images. Every single one of these background images needs to be loaded individually, which means a separate HTTP request per image (see my earlier post on Content Delivery Networks and the “max HTTP connections per proxy” limit as to why this can cause issues).
You can actually combine all (or least most) background images into just one file, load that file only one time and tell your site to draw the exact same image on screen by referencing a specific area in the file. Take a look at the below file for example:
![]()
You may recognise some of the elements of my website in this file and while the act of spriting your background images may sound like a daunting task it’s actually not. A service called SpriteMe.org makes the process very simple and I’ve provided a brief walk-through below. There is debate as to whether spriting your images is worth it or not. Background images are typically quite small – a few kilobytes in size. As such, any HTTP request for these images is brief and closed quickly. However, the act of serving sprited images will still help you shave time off your page-load, and anything which speeds up load time is always worth it, in my opinion.
[tabs slidertype=”left tabs”]
[tabcontainer]
[tabtext]
Spriting the background images
[/tabtext]
[tabtext]
Modifying your site’s CSS to include the sprites
[/tabtext]
[/tabcontainer]
[tabcontent]
[tab]
Before modifying any core WordPress or Theme files, always ensure you have a backup of the original file.
Start off by deactivating W3 Total Cache, or any other caching plugin you may have enabled. Additionally, start by putting CloudFlare into “Development Mode”, if you use it. You may also find it easiest to work with the “un-minified” backup of your CSS stylesheet (assuming you’ve minified it already following on from my previous post).
![]()
![]()
![]() You will see a new screen appear with some changes which need to be made to your site’s CSS, as well as links to the new sprites which have been created. Save the sprites to your computer at this point, and copy the required CSS changes to a document for safe-keeping.
You will see a new screen appear with some changes which need to be made to your site’s CSS, as well as links to the new sprites which have been created. Save the sprites to your computer at this point, and copy the required CSS changes to a document for safe-keeping.
[/tab]
[tab]
![]()
Start off by uploading the sprited images to your website. You may find it easiest to upload them into the same folder that is currently being referenced by the WordPress theme you are using for its background images – usually something like wp-content/themes/Theme-name/images. You may also wish to rename the sprites to something else, but remember to rename them in the CSS changes document you saved as well. Go through the document and change the location of the sprites to the place where you uploaded them to. So, for example: the link to ‘http://www.jaredhirsch.com/coolrunnings/public_images/2c4799b718/spriteme1.png‘ might need to be changed to ‘images/spriteme1.png‘, or even ‘images/sprite01.png‘, if for example you changed the sprite filename to ‘sprite01.png‘.
Open up the main stylesheet for your site (ensure you keep a backup in case you make an error and need to roll back your modifications) (usually style.css in the theme directory). Start off by going through the list of CSS changes and searching for each line that is struck through in the document. You may find it easier to search only for the text before the “{” sign.
![]() Make the required modifications as per the document. Remember – you should be adding text to change the address of the image, and the background position. If there is text controlling the float, margin, or other properties of the image then you must conserve these.
Make the required modifications as per the document. Remember – you should be adding text to change the address of the image, and the background position. If there is text controlling the float, margin, or other properties of the image then you must conserve these.
Once you’ve finished, save the changes, re-enable caching and/or CloudFlare and purge your page cache. Enjoy the fact that your site is now making fewer HTTP calls on loading!
[/tab]
[/tabcontent]
[/tabs]
Featured image courtesy of David Castillo Dominici / FreeDigitalPhotos.net
>> Introduction
>> Part 1: Caching
>> Part 2: CDNs
>> Part 3: Asynchronous Loading
>> Part 4: Image Optimization
>> Part 5: Security
>> Round-up and acknowledgements
Unfortunately I couldn’t do anything with my blog, because I tried to backup my SQL Database, as suggested by you in Part one but found it too complicated on Bluehost and gave up.
Hi Ivy, I strongly recommend this plugin. It will backup your DB for you at intervals of your choosing and either store the backups on your server or upload them to a location of your choosing – FTP, DropBox etc!
Thank you Charles. I just uploaded it to my site. I hope there is nothing further I need to do before proceeding with your tutorials 🙂
There are so many plug-ins and sites available to help with this stuff. I had no idea! Even though I’m not self-hosted the imaging compression info is interesting and useful. It might even come in handy at work. And I love the shot of the squashed tomato – so dual purpose. It’s a great shot for the “you’re wrong” context and the “image compression” context. Love it! Made me giggle. 🙂
Haha, glad I could bring you a chuckle! 😀
The image compression tip is a good one – even people who aren’t self-hosted can do a lot of the things I mention in this particular post, so I hope you’ll find it handy 🙂
Thanks Charles! Some very useful info here that I didn’t know about and some plug ins I can install. I do need to optimise my photos, that is one thing I haven’t paid attention to. I will work on my site soon. Don’t be surprised if you get emails from me!
Nazneen
Thanks Nazneen – do let me know if you have any queries! 🙂
I usually colour correct and reduce my photos for the blog before I upload, I checked out WP Smush.it and I can’t find it (of course, I don’t own my own domain yet, I’m still considering it).
My images don’t seem to take a long time to load, do they? I usually save them down but I can’t bring myself to reduce them down, but I think theory are OK.
Do you know if wordpress backs up wordpress hosted blogs?
Although these tutorials are above me, I thank you for taking the time to write them with such clear instructions. If I ever decide to be a free agent, I shall definitely look it up.
Hi Eva, you should definitely get your own domain (and self-host I think… it’s not at all complicated. My tips are really only aimed at people who want to “power up” their blog. My next and final post in the series has some information which you may find useful specifically about self-hosting… security and other important things, so hopefully it will persuade you? 😉
There is some great info here. Thanks so much. My blog is in desperate need of an overhaul. I have to get it sorted and a lot of my issues stem from the amount of images I have on my site! xx
Thanks Charlie – I hope you’re able to get your issues resolved… let me know if you need any additional information 🙂
Hi Charles – I really enjoy these blog improvement series. I have been trying to do a makeover on mine, so these are really helpful. I hope you’re enjoying your summer with your family.
Thanks Yudith, long time no see! Summer is… well, hot right now. I’m definitely a cold-weather person but it’s fun to take walks in the evening when it’s a bit cooler! 🙂
Great tips, Charles! You make it all sound so straightforward and simple :).
Hehe, I do my best 🙂
Another brilliant post! John swears by blog vault.. have you tried it?
Hi Maureen, I haven’t tried them I must admit, no, but I prefer to go for free options, and options which are self-contained as well. I have used the plugin BackWPup up to now which supports backup to Dropbox of files and the DB. It’s very good 🙂
We do too but moving Helene D’Souza from one webhost to another took about 10 minutes using Blog Vault and it only cost $9. In our opinion worth it for no down time. 🙂
I suppose, but it’s still another expense. If you can create a zip file of all your files on the server and have shell access on your new host you can easily do a wget command to just grab the zip file. Takes no time to copy over and then all you have to do is install the database and unzip everything and you’re good to go.
A touch more fiddly I suppose but I’ve always been one for cheaper, manual solutions than paid-for automation. Besides – how else would I practise my Linux terminal command skills? 😀
Hi Charles, remember my photo format issue? 😉 You have helped me a lot! Thank you once more! I slowly keep on changing old photos too.
I sometimes see blogs with very heavy photos which are I think resized but the page loads actually the whole weight and I think that people never realise it and just assume their blog loads slowly by accident…
Thank you for all the useful tips and information. Very well explained, as always.
Hi Sissi – indeed, I do remember!
I’ve seen such sites as well… resizing purely by HTML is really bad…. loading a 1meg 1600px image and resizing it for 240px for example just by setting image dimensions… urgh!
Yeah, I agree, working with full-sized images is cumbersome and inefficient — I got into the habit of resizing my images in order to be able to work with them more adeptly but also thanks to the fact that generally, whenever you submit an image to virtually any food site, it has to be shrunk to specification. I use jpeg so happy to hear that’s the file format you recommend. My latest coup is learning how to use the snipping tool (I can now capture images (example a chart) snip it (frame it to size) convert to a jpeg image and upload it to my blog — that’s how I do my nutrition facts panels). Very satisfying for this non-techie :).
Hi Kelly, I never got in to the snipping tool… it always seemed much too cumbersome and clunky. I think it has no options to set a default save location for example. Sometimes I just want to quickly grab a screenshot, or a section of a screen and save it, without messing about and choosing a filename!
Your nutrition panels are good too, although if I was being nitpicky they should strictly be in PNG format, since they’re text! 😉
Somme very useful info here. The yahoo plugin doesn’t work anymore on my blog, I think so it has something to do with the thesis theme. I ll take a look at the other mentioned plugin. I had heard of spriting before but I had no clue how it is done. thanks for all the info once again charles, you are the best!
Hi Helene – weird that the Yahoo plugin doesn’t work anymore… do you get any error message?
Lots more stuff that’s quite good to know! Thanks for all of this fabulous information! I’ll be adding Smush it tomorrow!
Thanks MJ – let me know if you have any questions!